If your next installation involves a hybrid kitchen faucet, panic not. We understand the faucet’s multiple features make the set-up sound overly complicated. But it’s not – so we put together a simple and easy guide for you to stick to.
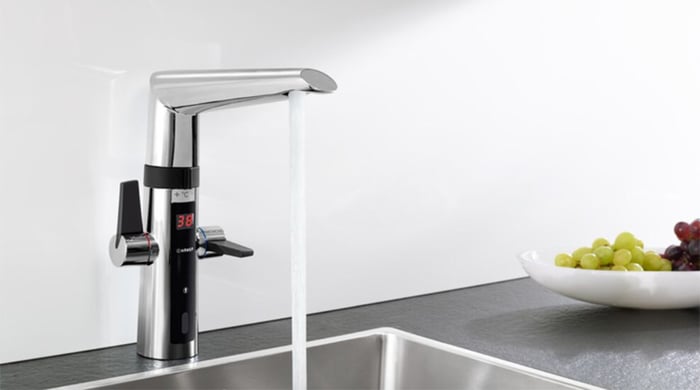 Oras Optima hybrid kitchen faucet with touchless function
We understand that the hybrid kitchen faucet’s multiple features can make it seem complicated to set up. That’s why we put together a simple and easy guide for you to follow on your next installation.
There are many variants of hybrid kitchen faucets – some need batteries, others include a dishwasher valve, for instance. However, the following guide can be applied to all current Oras models.
Before you begin, please make sure that your working conditions are safe and suitable at any time. The temperature of hot water must not exceed 70°C (160°F) and the minimum working pressure is one bar and the maximum is ten.
Now – here is what you should be checking before the installation can take place:
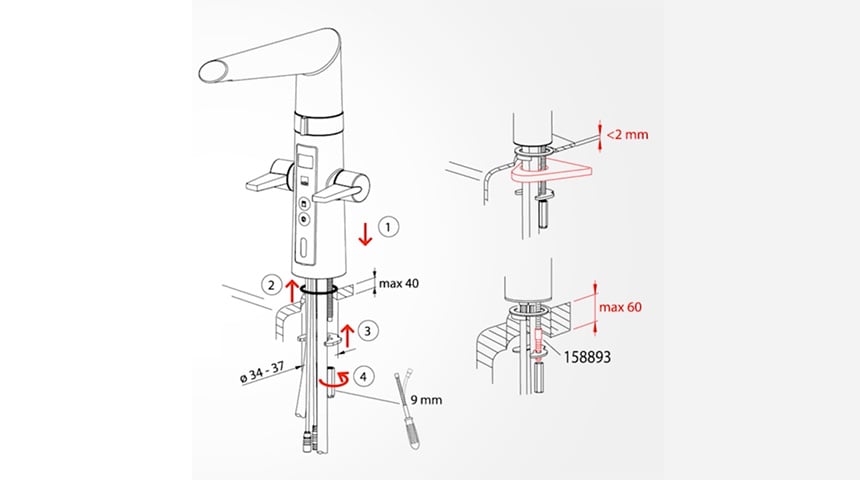
- The diameter of the mounting hole (34-37 millimetres.)
- The thickness of the countertop (2-40 millimetres).
- The thickness of the countertop with extension screws (up to 60 millimetres.)
Once you’ve checked all three, let’s have a look at the tools you will be needing:
- A 19-millimetre spanner or wrench
- A 9-millimetre box wrench an Oras faucet installation key
At this point, you can start by installing the faucet on the countertop.
1. Place the O-ring seal on the bottom of the faucet’s body and thread the faucet through the draining board mounting hole.
2. Fix the faucet by attaching the fixing plate underneath the draining board with two installation nuts.
Here you can use the Oras faucet installation key or the 9-millimetre box wrench or 9-millimetre box wrench. If needed, use the supporting plate which is included in the package.
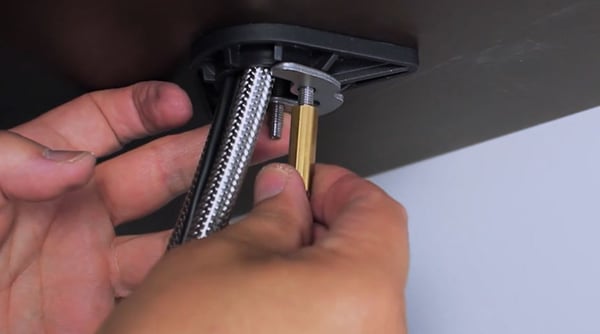 Fix the faucet with fixing plate and two installation nuts
3. Connect the couplings to the hot and cold water supplies, and remember to install the litter filters that are included in the package.
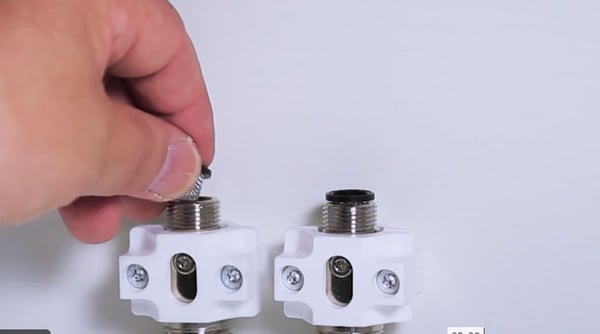
Remember to add the litter filters
4. If the hybrid faucet you are installing includes a smart dishwasher valve, connect the dishwasher valve between the hot or cold water supply couplings and the coupling pipe.
Use the 19-millimetre spanner or wrench. Fix the dishwasher valve to the wall according to the instructions, with the bracket included in the package.
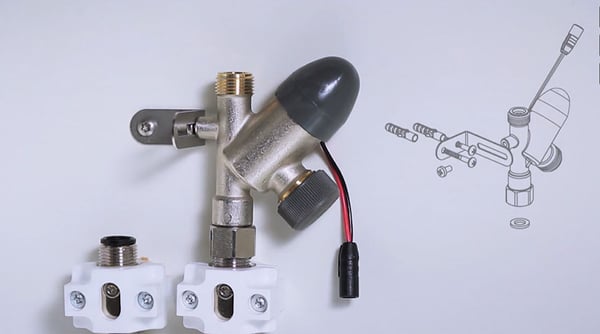
Connection of HANSA SMART dishwasher valve
Always make sure to pay attention to the correct position of the valve: if the dishwasher has not been yet installed or has been removed for maintenance, the valve must be plugged. Here, tools are not necessary to attach the plug – tightening by hand is sufficient.
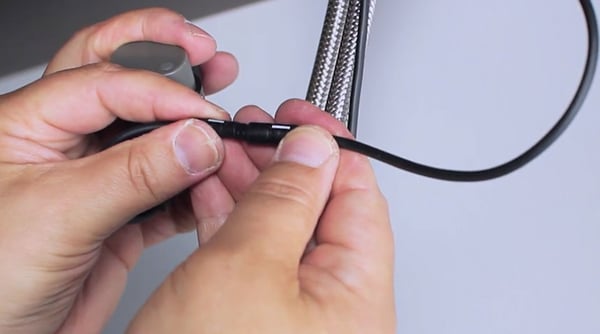
5. Finally, connect the leads
- In the battery-operated version, connect the battery lead from the faucet with the battery casing lead. Here, then connect the battery casing with its own fastening either with the cold or hot water supply.
- In the plug transformer operated version, connect the power lead from the faucet with the transformer lead
- In the dishwasher valve version, connect the leads to one another.
Changing the spout turning angle
By default, the spout turns 120°. But if needed, the turning angle can be changed by pressing the limiter behind the spout with a suitable tool.
Lift the spout out of its position, take out the limiter which is on the faucet’s body and turn it to the desired position. Markings on the limiter indicate the correct turning angle.
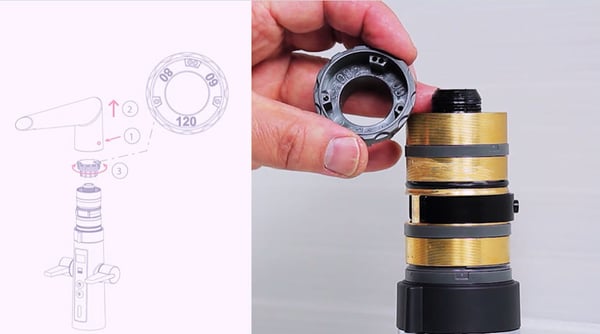 The spout’s turning angle can be adjusted to three positions: 120°, 80 ° or 60°.
Now put the limiter back, so that the desired turning angle faces the user.
Assemble the kitchen faucet, make sure that the spout locks back into place.
We hope the guide has made the installation easy and smooth. If it makes things easier, you can check out the video guide. And remember to always check the installer’s manual each faucet comes with.


What are EPDs and why is it important to look at the full lifecycle of a faucet?
We’ve gathered our sustainability experts to discuss everything project planners need to know about navigating the complex world of environmental certifications and documentation in the future.
Read more
Architecting a flagship faucet experience onboard one of the world’s most climate-smart passenger ships
When Viking Line planned the design and interior of its new passenger cruise ship, Viking Glory, equipping the 222-metre vessel’s bathrooms and kitchens with the right choice of faucets was a smooth...
Read more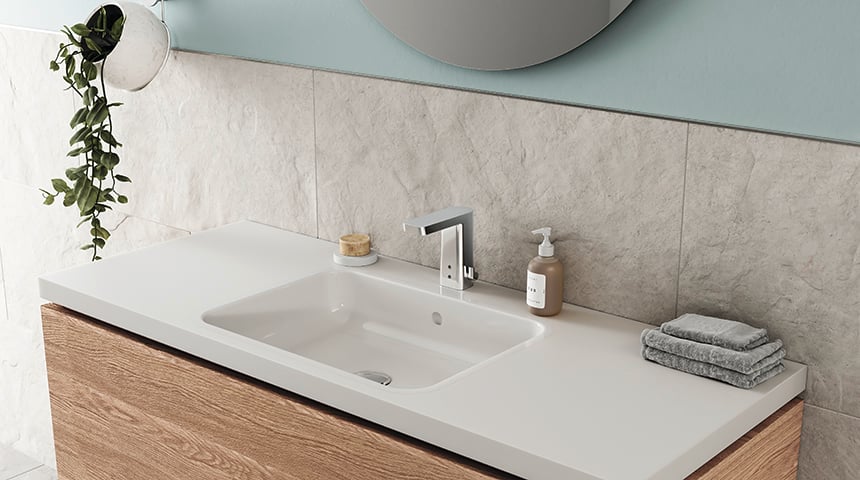
How to consult your customers on sustainable faucets
Long-lasting and resource-efficient installations are in high demand – today more than ever before.
Read moreSign up for our newsletter
Subscribe to our mailing list and get our latest content to your inbox. Monthly, we provide you with our best insights, tips, news and more.